Niantic Lightship Guide: Getting Started with Templates
The journey with Niantic continues! After the first stop – Getting Started with Niantic Lightship – it’s time to take your Lightship AR experiences further. To make it easier and quicker for you, as well as help you use your creative potential to the max, today we’re introducing Lightship ARDK Templates.
Templates are pre-developed projects that simplify the creation of your AR experiences by automating different ARDK features. This way you can focus less on how the technology works and more on building your vision.
➡️ By the end of this tutorial you’ll be able to install the Lightship Hub in Lightship’s ARDK in Unity, choose a template, and customize it to make it your own. You can follow the steps below or we can go over them together on this video.
➡️ By the end of this tutorial you’ll learn how templates work in the Lightship ARDK and customize them to make them your own. You can follow the steps below or we can go over them together on this video.
If this is your first time working with Lightship ARDK, please see our “The Basics” video tutorial to learn about the requirements to set up your first project.
Now, let’s get started!
LIGHTSHIP PROJECT SETUP
To start working with Lightship Hub, you need to install ARDK and Lightship Hub packages.
Start by creating an empty Unity project.
⭐️ Installing the ARDK package
⭐️ Download the Lightship ARDK Unity package.
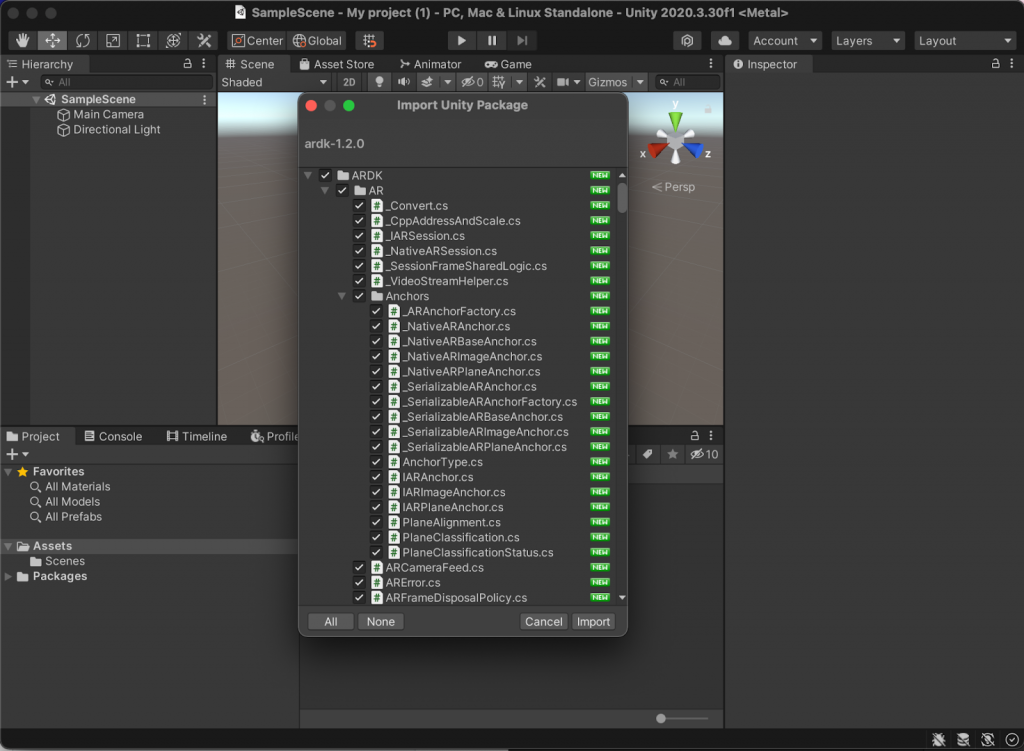
⭐️ Install the package by going to the menu and clicking on: Assets > Import package > Custom package.
⭐️ Locate the downloaded package and import it.
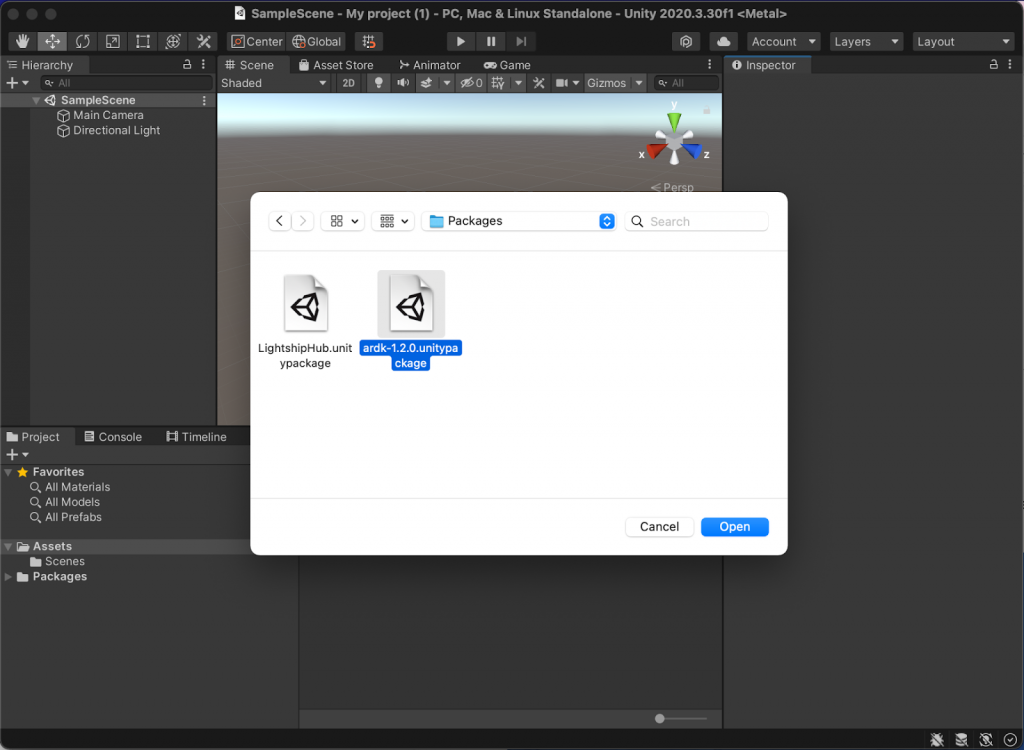
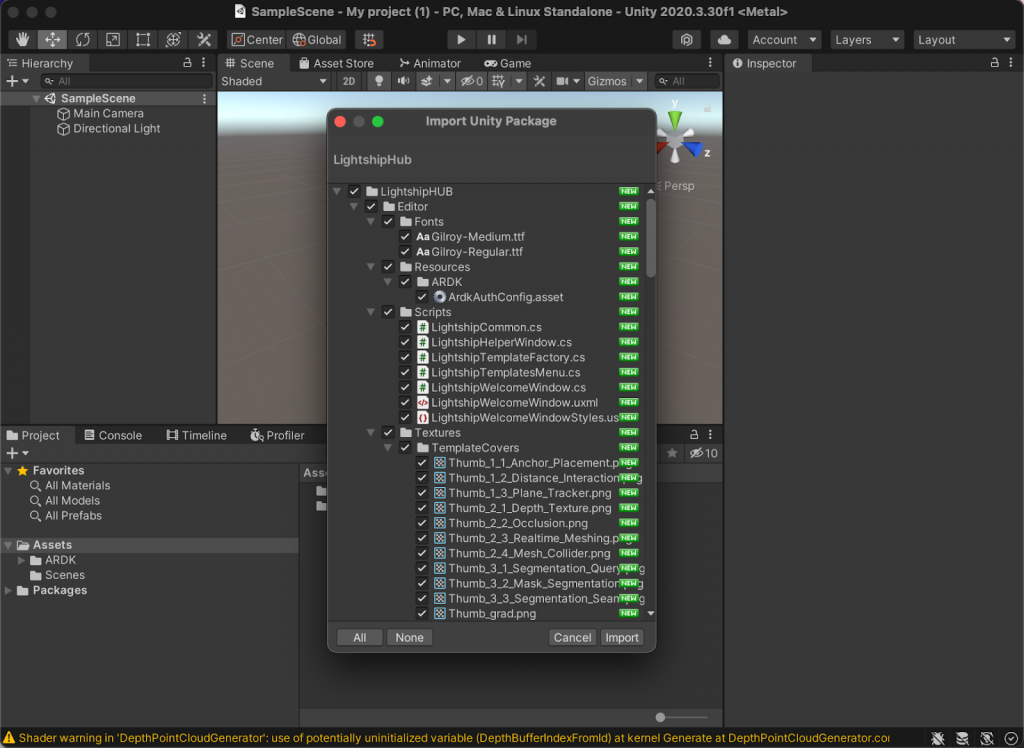
Make sure you import all assets on the Import Unity Package window.
INSTALL LIGHTSHIP HUB PACKAGE
Now we are going to repeat the same process to install the Lightship Hub.
⭐️ Download the Lightship Hub Unity package from the Lightship Learn site.
⭐️ Install the package by going to the menu and clicking on: Assets > Import package > Custom package.
⭐️ Locate the downloaded package and import it.
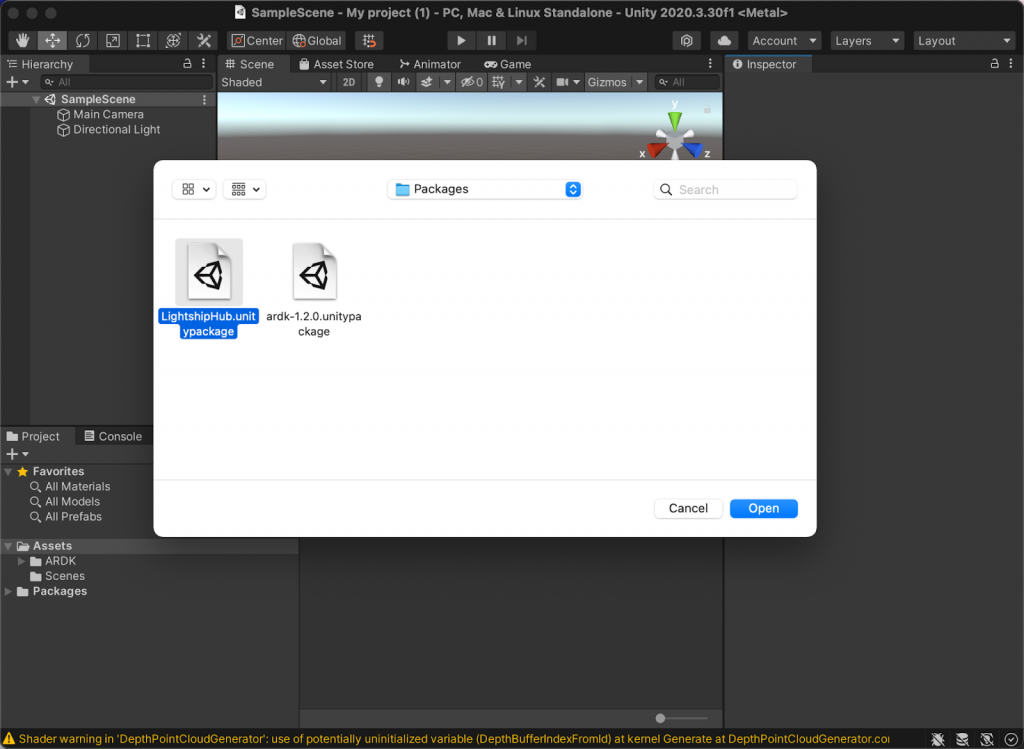
Make sure you import all assets on the Import Unity Package window.
CONFIGURE LIGHTSHIP LICENSE KEY
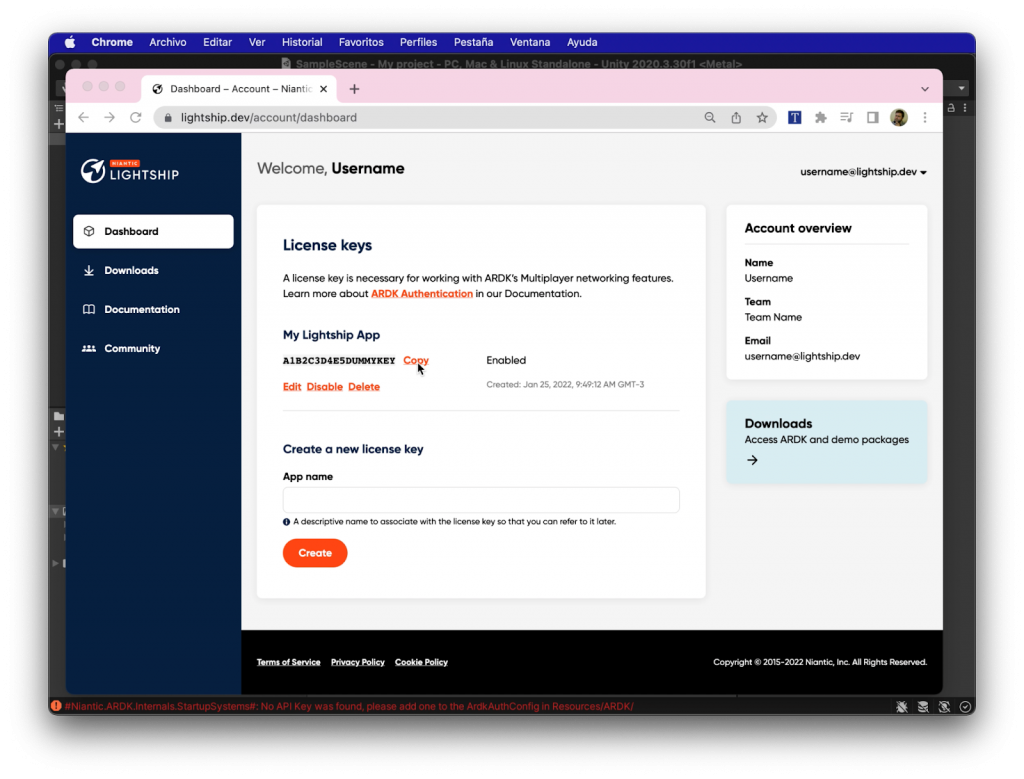
To start using Lightship, you’ll have to get your API License Key. This way we can identify who you are when you’re using it.
To do this:
⭐️ Navigate to the lightship.dev site and on the dashboard, create your License Key.
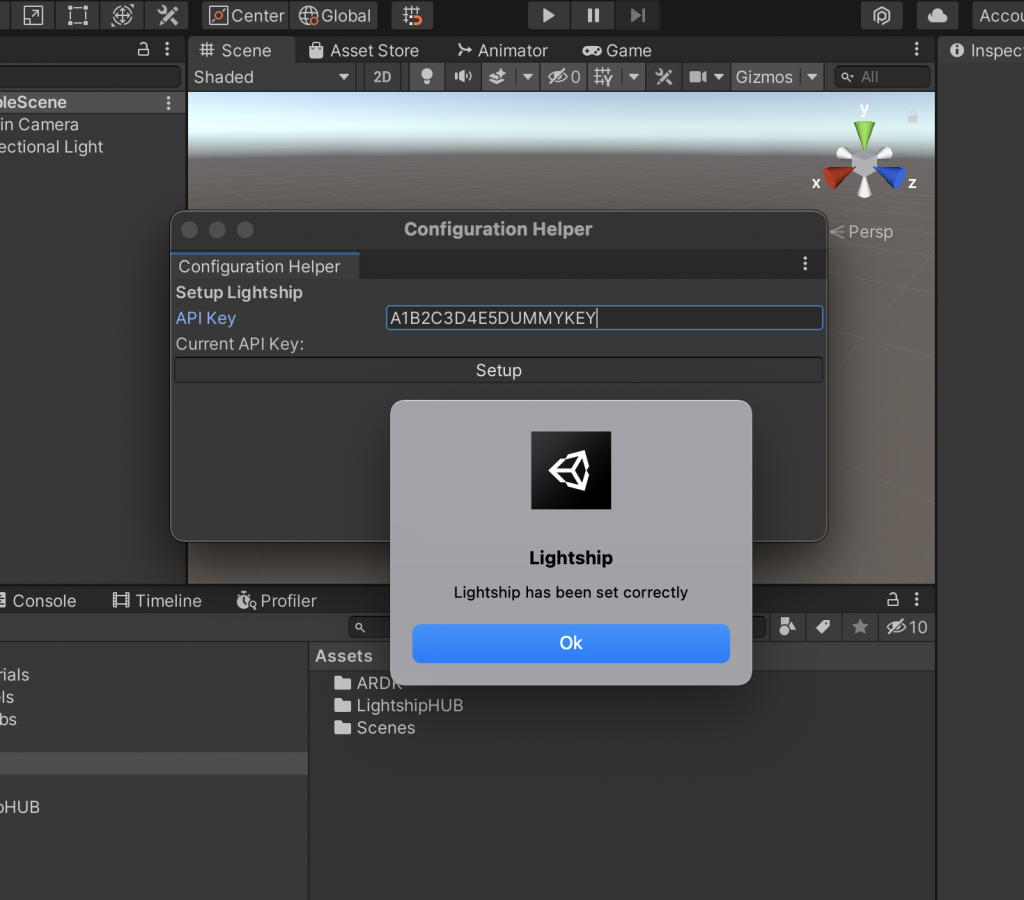
⭐️ Open the Configuration Helper Window under Lightship > Lightship Hub > Configuration Helper Window.
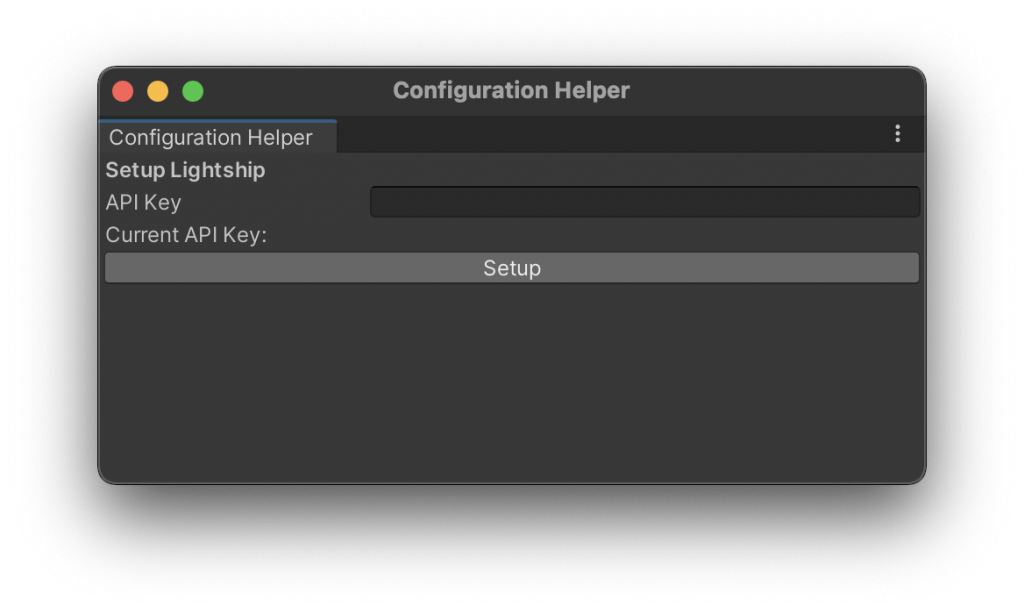
⭐️ Add your API Key and click on setup to finish the setup.
Great, we’re done setting up the ARDK and the Lightship Hub package!
LIGHTSHIP MENU
Your project has a new menu called Lightship where you can find templates, help, and tools.
You can access the Welcome window where you can find a more detailed list of the templates.
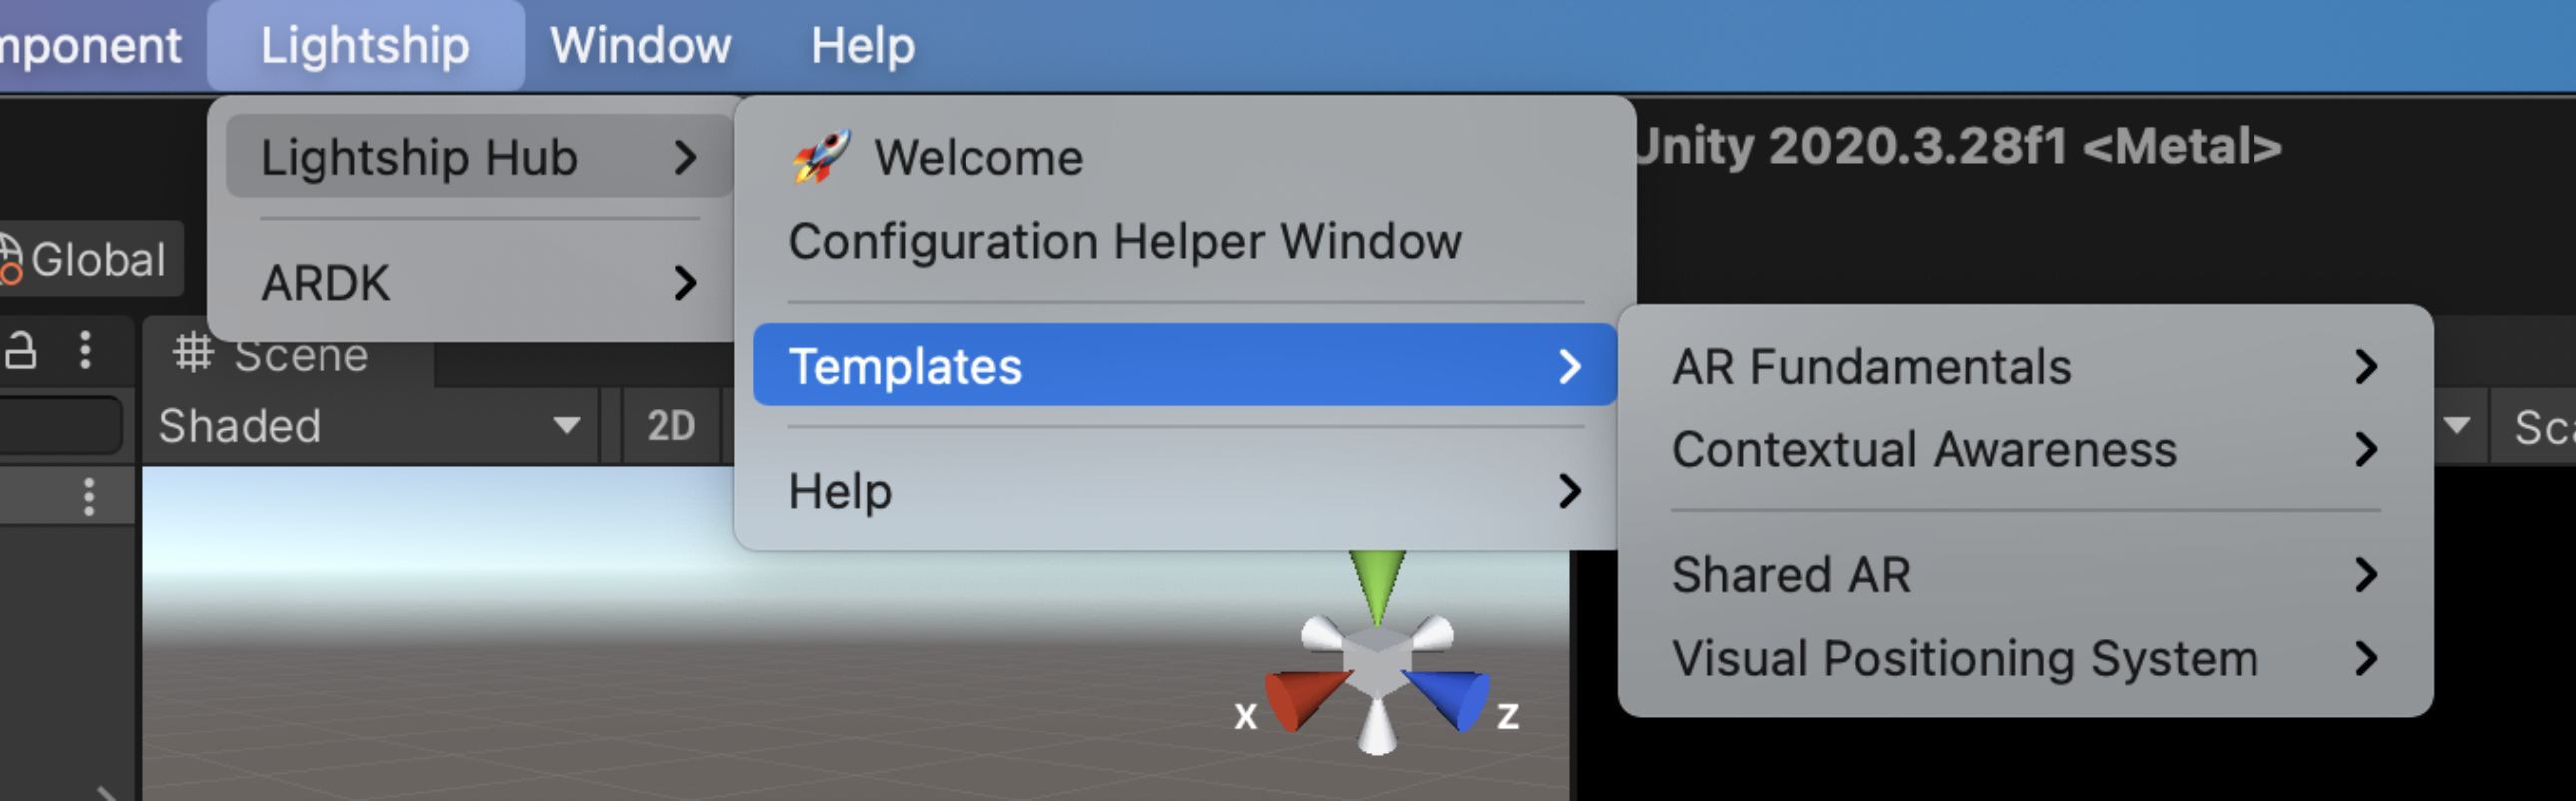
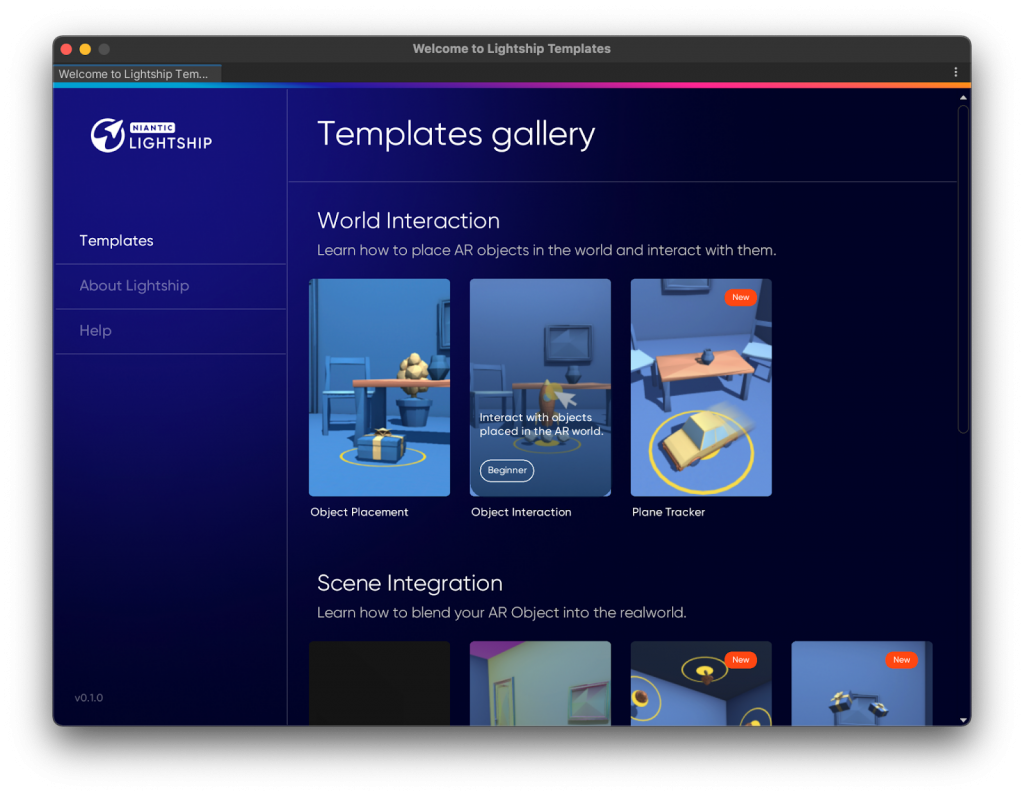
Templates are divided in different topics such as AR Fundamentals and Contextual Awareness. Within each topic you’ll be able to find simple to complex templates that will help you jumpstart your project easily.
Let’s use the Object Placement template as an example.
Object Placement uses plane detection to place an object in the scene. This template will create a series of objects and set up a scene with all the scripts and components you need to start working, so you’ll have a fully working scene that’s ready to be exported.
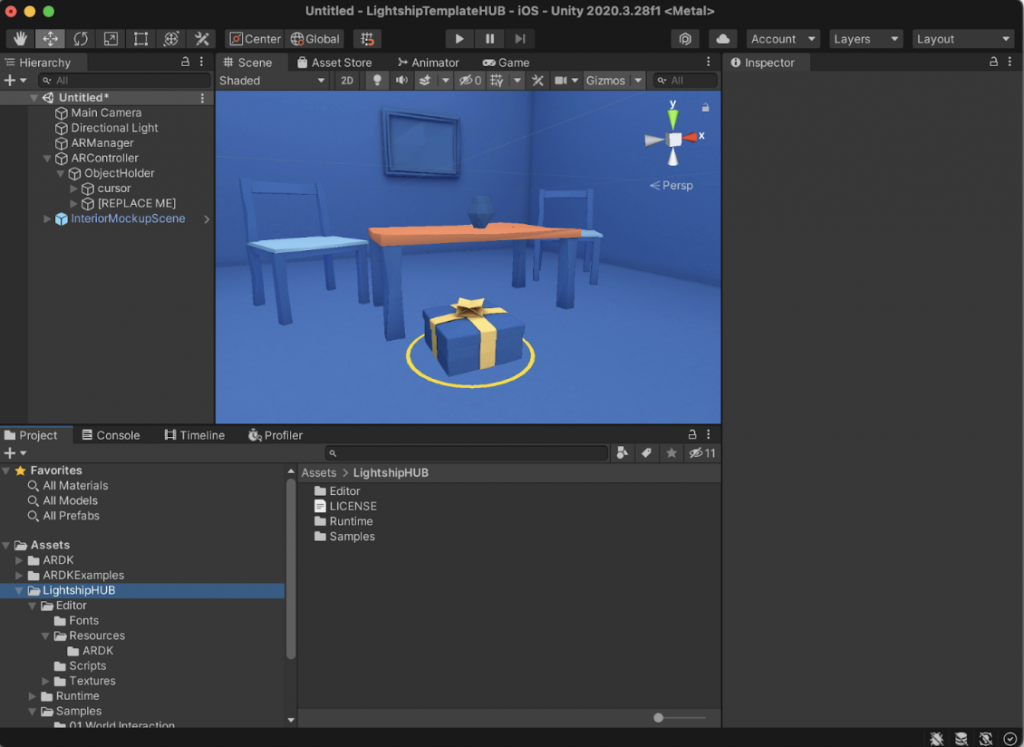

All templates include a Mockup Room that lets you try the AR project in game view mode. Just click on Play to test the scene. HOWEVER, if this is your first time using templates, you’ll need to select a mock environment to test out your scene with.
⭐️ Go to the Lightship Menu > ARDK > Virtual Studio and Select Mock, then choose either the indoor or outdoor environment. In the game view, you’ll be able to see the template in action and interact with it in the mock environment
You are able to customize all the templates to make them your own. To add your own content to the template, replace the “[REPLACE ME]” object with your own 3D model.
Once you have changed the object with your own, this will be used throughout the project instead of the placeholder provided in the template.
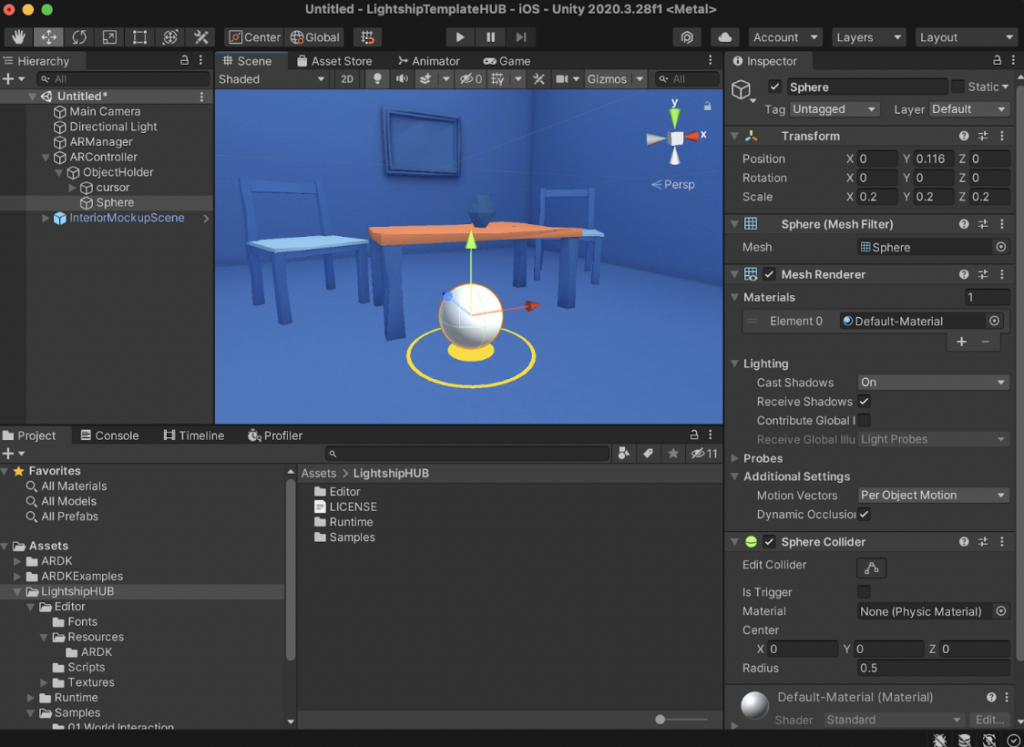
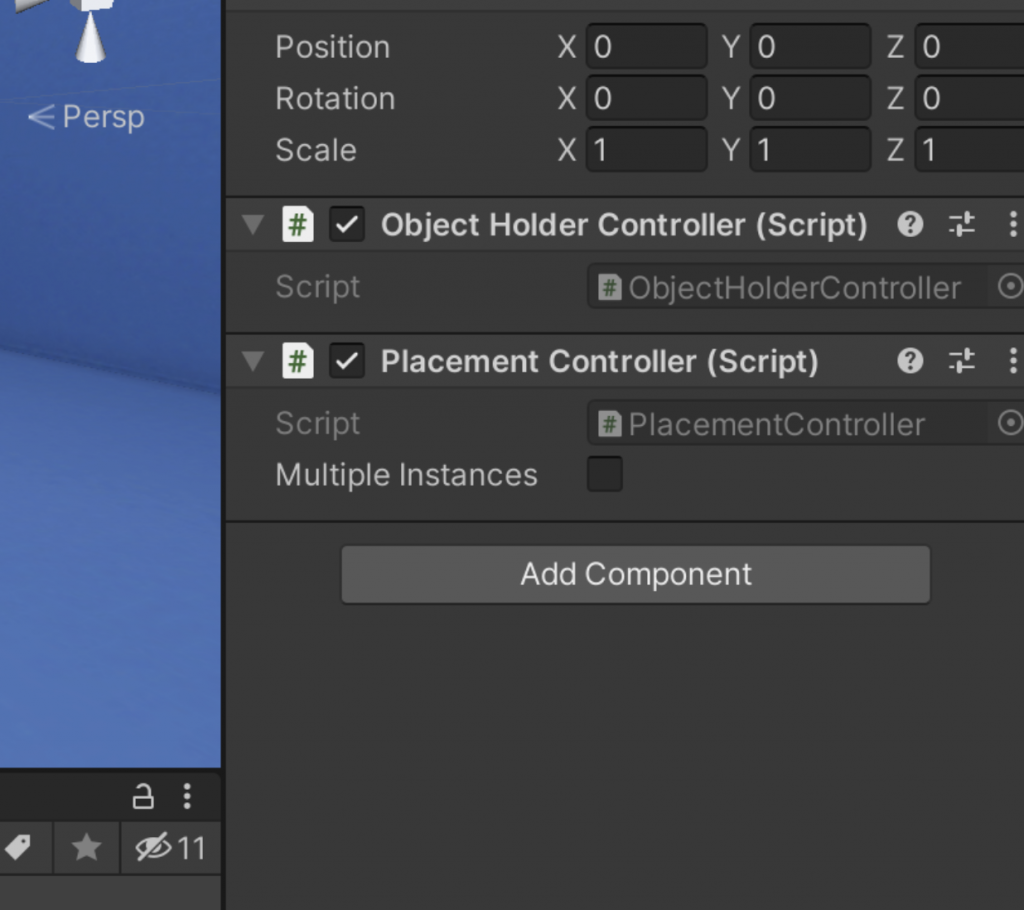
All templates provide an option to change the scene behavior. Select the ARController and the inspector panel will show the different options available.
Congratulations! You have successfully learned how to use templates to build your projects using Niantic’s Lightship Augmented Reality Development Kit. Now you can test out what you built on your device. If you need guidance on doing that, check-out our “The Basics” video!
Hopefully you’ve seen how easy it can be to add augmented reality to your project by leveraging the Lightship ARDK.
WHAT NOW?
⭐️ Check out our Tutorials page for several tutorials over specific Lightship topics.
⭐️ Join the Lightship Community Discord to discuss Lightship projects with other developers.
⭐️ Follow Lightship on Twitter and Instagram to see projects built with Lightship and stay in the know with updates to the platform.