Snap AR x Lenslist AR Asset Hackathon: Lens Studio Assets Explained #1: 2D Textures & 3D Models
We are excited about the launch of the Snap AR x Lenslist AR Asset Hackathon – the first event dedicated solely to ASSETS, not Lenses! We know it’s new to you and you might have lots of questions about how to submit your assets, that’s why we’re starting a new article series called Lens Studio Assets Explained, where we explain how to prepare, export and submit different types of assets welcomed in our hackathon.
Today, we’re starting with 2D Textures & 3D Models – assets you create and use on a daily basis. What you might not know are the requirements and guidelines necessary for your assets to exist in the official Lens Studio Assets Library and to be in agreement with our hackathon rules… and this is exactly what we want you to gain from this article!
First of all, check out the Assets You Can Submit:
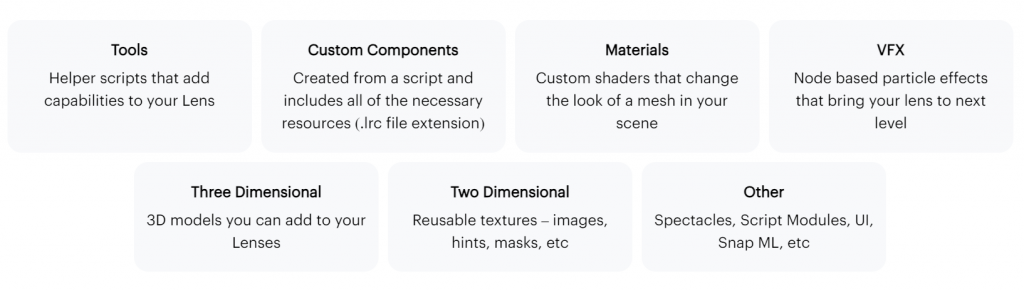
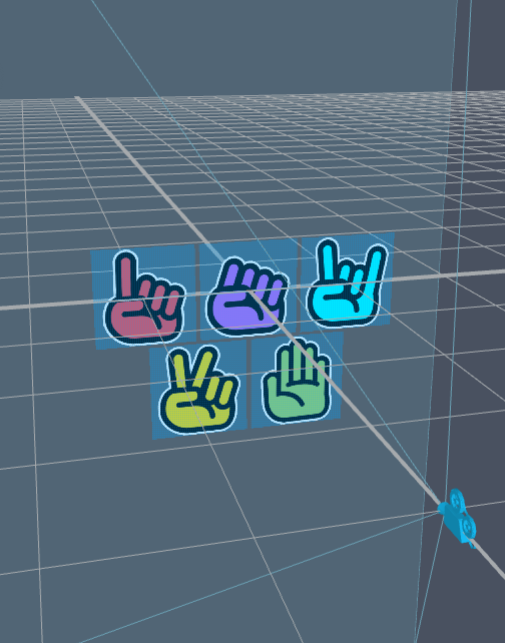
You must categorize your assets when submitting them for the AR Asset Hackathon. You’ll be able to submit the following:
🛼 Preparing Object for Export
- Create a descriptive and somewhat unique name for your asset. You should make sure it is obvious and describes the asset well.
- Name your resources or/and scene objects accordingly.
- If you are exporting scene hierarchy, parent all related scene objects under one parent called `Asset Name __INSTRUCTION.` Instruction is meant to provide a short guidance on how to add this object to the scene. For example:
- __PLACE_IN_OBJECTS_PANEL
- __PUT_IN_ORTHO_CAM
- __PUT_UNDER_MAIN_CAM
- Create a new folder in the Resources panel and call it _Asset Name Resources._
Create Subfolders as needed and place all the resources used inside this folder. For example: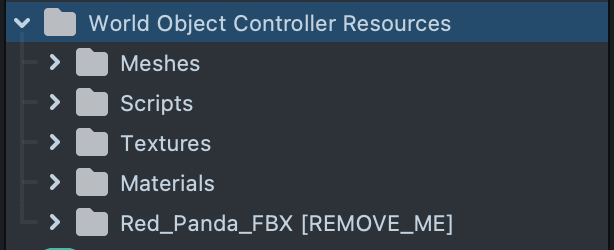
- If an asset needs a more detailed explanation, please include an Instruction card preset into your asset and parent it to the main scene object.
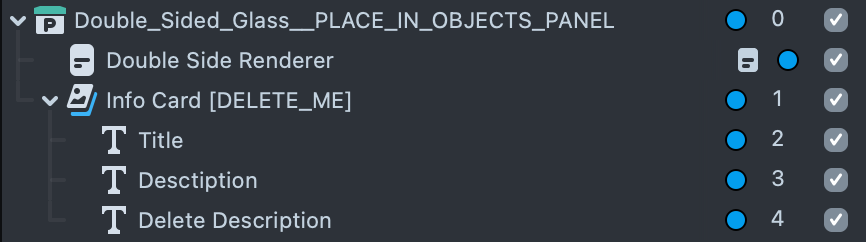
Tip 💡 Info Card asset is available in the Reference section of Asset Library.
- If using any third party resources, please include license information in a .js file
- Export it in one of the following ways:
- Resource: Right click on the resource in the Resources panel and select Export. Another way to share multiple resources is to reference them in a scene and create an Object Prefab.
- Object Prefab: This is a most convenient way to share scene hierarchy. This way an asset is added to the Resources panel and does not immediately affect the Scene, but at the same time when added to Scene you are provided with a ready to go working setup. To export as Object Prefab; drag your scene object onto the Resources panel, right click and select Export.
- LSO: if your asset contains multiple cameras and Render Layers the best is to export it via LSO to preserve all information. Right click on the scene object in the Objects panel and select Export Object.F
Open a new project and double check your asset before uploading it to make sure everything will be imported correctly.
🍕 Textures
All texture types that are supported by Lens Studio (guide) such as PNG, JPG, JPEG, GIF, T3d, Lensanim.
Note: Please keep texture resolution under 2K.
If you are creating a texture pack, please add textures to the scene via Image or a Screen image. Parent them under one scene object and follow the Object Preset (“Preparing Object for Export”) guidelines above.
This will ensure all textures are packaged and can be distributed as a single importable file. It’s also easier for users to instantly see them in the Scene or Preview panel.
🍎 3D models
Next file formats are supported:
- FBX
- OBJ
- GLTF
Please follow these general directions to prepare your 3D model for Asset Library:
- Try to keep your models under 100,000 triangles, or 60,000 triangles for meshes with joints/skinning for best performance.
- Name all your meshes and bones nicely and descriptively, merge meshes that can be merged to simplify.
- Place pivot to the object center or another point that would allow you to easily manipulate the object in the scene panel.
- Reset or Apply all Transforms if possible.
- Make sure normals are facing the right direction.
- Meshes need to have a UV map and texture for use in Lens Studio.
- If you want to add additional detail to your model, it is recommended to use a normal map texture.
- For animation, configure your tool’s time unit to be 30 FPS (frames per second) and make sure to export the whole range of animation frames.
🏀 Asset Thumbnail
Design a preview image of your asset that will be the user’s first impression. Please make sure it is engaging, reflects your asset well and fits a colorful Asset Library aesthetic.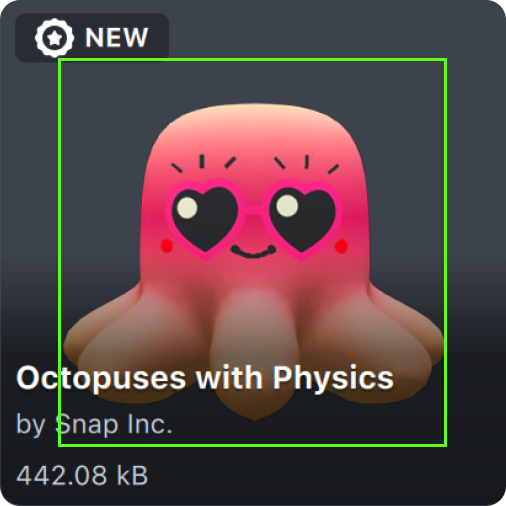
Please export your image as a 512 x 512 px png file preferably on a transparent background. And allow some space around the subject for UI elements
Here are a couple of additional references for you to use:
Custom Component Thumbnail Template
Script Module Thumbnail Template
✏️ Description
Provide a short description of your asset, for example;
“World Object Controller allows you to add a 3D object to the world that the user can walk towards and around. This tool gives you access to manipulation control which allows the user to move, scale and rotate the object.”
Provide useful links that would provide some context for your asset (Guide, Template, etc)
Provide keywords that could be used to find your asset. If it consists of several elements, list out their names so they can be used for search.
Additionally, we would like to emphasize the particular aspects of the AR Asset Hackathon rules that require special attention! ⬇️
Asset Requirements
- Must be compatible with Lens Studio 4.49+, please check that your assets work as expected in the latest Lens Studio version,
- Assets must fall within one of the categories outlined above,
- Both previously built assets and new assets are welcomed.
Asset Guidelines
A good and viable asset is a versatile building block that allows for use in a variety of ways. Some examples are if you are creating a texture pack, please allow for several different example use cases. For materials, please provide some customizable inputs so others can fine tune your materials to fit their needs. For 3D assets, please allow for several variations or animations that inspire and enable creators to work on their projects.
Make sure to provide clear instructions on how to use your assets. For example: Does it only work with a Screen Transform? Does it require special configurations? Which parts of the asset should a creator edit and which ones should they avoid editing? Make your asset work as out-of-the-box as possible!
Other best practices can be found here:
Go to Asset Library Publishing Guide
How to Submit Your Asset(s)
In the submission process, you’ll have to go through 2 submission forms – one, very simple one, here on our Lenslist Hackathon Registration Site and another one provided by the Snapchat team – Asset Library Submission. To make sure both forms match, you’ll be able to generate a UUID code on the first Lenslist registration form and then paste it in the Google Form, meaning the Snap submission form.
By following all the instructions correctly, you will get closer to success! 💪 And to further motivate you, we’d like to remind you of the attractive prizes up for grabs – a $40,000 prize pool and a round 100 prizes to give out, spread between 25 inspiring categories with 4 tiers each: Diamond ($1,000), Gold ($300), Silver ($200), Bronze ($100). 🤑 Important note – a single asset can win up to three awards from different categories, and each of you can submit a maximum of 10 assets!
Also, until August 8th, be on the lookout for upcoming workshops that will help you improve your project both creatively and technically. In short, stay tuned to our Instagram profile and website to make sure you don’t miss any important updates. 🙌🏻 Time is flying, August 20th is less than a month away – make sure you are well prepared by checking out the AR Asset Hackathon details here! 🏁🏆