Furry Filters: New Trend in the AR Community
As long as AR platforms develop, we will experience more and more new ideas from filters’ Creators. Recently, we saw a huge advacement in using materials in social media AR with the appearence of furry filters. We’ve asked AR Creators about their effects that use fur as a material.
Creativity of AR Creators is endless – the only limitation comes from a current state of technological advancement. Not only when it comes to features available in Snapchat’s Lens Studio and Instagram’s Spark AR, but also in case of hardware. For example, LidAR technology, now available only in iPhone 12 Pro, will change mobile AR forever with the filters recognizing objects around them. The most imporant factor, though, is the speed of mobile networks – social media AR filters must load quickly, so Creators have a pretty strict project size limit.
But even though there are many obstacles, AR Creators use their programming skills and creativity to find fixes, tweaks and tricks to push these boundaries. Recently, a few exceptional designers were working on applying fur into AR filters. Pavlo Tkachenko and Alexander Surnin from Areyes Studio developed a shell shader that gives possibility to make AR filters with fur. Helena Bahdzel was one of the Creators who took full advantage of their willingness to share by developing a few animal filters. In the meantime, Eddy Adams created a tutorial on how to create fur using a similar technique (you must check his Spark AR Masterclass), and Filippo Soccini, who is planning to publish his tutorial soon, has just today presented his new furry filter My Teddy Face.
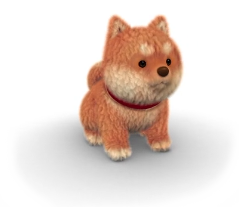
by filippo.soccini
by filippo.soccini
We’ve asked Pavlo Tkachenko, Eddy Adams (scroll to 👇 and Helena Bahdzel (scroll to 👇) (who used their shader to create several beautiful animal Lenses) to tell us more about working on fur filters.
Pavlo Tkachenko on creating a FUR SHADER
 Hi, my name is Pavlo Tkachenko. I am an official Spark AR Partner with more than one year of experience in AR.Currently I am working for @areyes.studio. In our New Year’s project for @lamodaru we had to make stylized 3D clouds that will look soft and fluffy. While working on this project with @alexandersurnin, for the first time we got a working shell shader..
You may think: «What is “shall shader” and how it’s related to Fur in Spark AR?»
Shell shader is not a new technique. It is quite common in game development. Shall shader is an array of geometry that has different alpha maps at each layer of geometry based on displacement maps. Thus we can get different volume shapes in the range of geometry stack that we have.
I found out three fundamental points that can help you recreate shell shader at any 3d rendering software:
- Array of geometry that scales up along the normal.
The more layers you add, the cleaner the cleaner the render will be. - Information about layers’ order.
This enables to make a unique alpha map for each geometry layer. - Displacement map.
We use its information to give the shape to shell shader: white color means maximum length, when black is minimum.
If we have all these things we can convert a displacement map by layer order information to alpha maps for each geometry level. More information can be found in the article by xbdev.net.
Now let’s come back to Spark AR. You perfectly know that Spark AR has limitations, and the most painful one for Creators is a project size.
Firstly, my product “Simple FUR” was based on model preparation in Blender. The idea was to make all shells by hand in Blender 3d using simple modeling tools. The simplest and fastest way to give Spark AR information about layers’ order that I found is to use Vertex color (RGB data for each vertex of the model). I assigned values from 0-1 for each layer depending on its order: 1st layer — 0; 2nd layer — 0.1 and so on. The step size you can calculate as 1/amount of layers.
However, this way has one huge disadvantage — memory size used by the model. Inspired by Lenslist’s “Call for Content” I decided to transfer my Simple Fur shader to Lens Studio. And I found something cool — the instancing system that allows to make geometry layers directly in material settings without any other program.
I was so impressed by the discovery that pypline becomes so easy, that I couldn’t stop thinking about it. As a result, I made a complex block system that works as an instance system at Spark AR.
 Get Pavlo’s Simple FUR assets for 👉Spark AR and 👉Lens Studio on Gumroad.
The last update of Simple Fur gives the possibility to make fur in a few clicks. You just have to open the block, add a model, assign material, save&close. All shader settings are available at block interface and can be linked to patch editor for some extra fur animations and so on.
Now fur shaders are really easy to use. This is confirmed by more and more new filters with fur. There are some of them:
by bagdellenok
by bagdellenok
by tsarenkova_anastasiya
by tsarenkova_anastasiya
by sasha_soul_art
by jgekusar
by Pavlo Tkachenko
by Pavlo Tkachenko
The last one has special fur dynamics. It’s a great looking but simple effect that can be achieved by moving the texture and limiting the movement by shell order. It will give you control of the movement only in the ends of the fur.
Eddy Adams on building fur in Spark AR
 Building fur for a real-time environment is a challenge. You obviously can’t create and render millions of individual hairs to use on a phone. You have to get creative.
One method used in video games is based around shells. If there’s a surface you want to applyfur to, you must first duplicate and extrude that surface several times to generate thickness to the model. You could do this in an external 3D program, but it’s more efficient to do it within Spark AR.
 To create the shells, I start with my base mesh and just duplicate it several times. The more duplicates you create, the more layers you have, therefore, the smoother the effect becomes. Of course, you don’t want to put too many layers in or your performance will suffer. So with all these duplicated models, you will use the normal direction of each point to push the points andpolygons out, away from the surface. To make sure the model doesn’t split apart, the phone angle/shading needs to be smooth. If you have hard, faceted edges, those polygons will moveout but will split from one another.
With the shell in place, the next step is to build the material. Each shell gets applied a differentmaterial. The shells near the bottom of the stack are darker, while the shells near the surfaceare lighter.
Spark AR – Fur from Eddy Adams on Vimeo.
The key here, though, is how to generate the correct alphas for each layer. Without any alphas,you would only see the outermost shell. So we need a texture of some fur or any other imagethat has a sort of depth effect (ideally a black and white height/displacement pass). With that,we can extract different levels of alpha for each shell. The shell on the bottom should be completely opaque while the outermost shell should be almost entirely transparent.
With all those materials in place, you should be able to see into the volume of shells you have created. This also breaks up the hard edge around the silhouette of the model since you’reessentially building a volumetric surface.
Helena Bahdzel on creating fur filters
How does the process of creating furry filters look like?
 I once wrote in the filter chat that it is easy to make fur in a blender, but it is unrealistic to transfer it to filters. After some time, Pavel Tkachenko wrote to me and gave me a file to test that allowed me to create fur. I was delighted, and so I started preparing a model for Snapchat. Instagram already had this filter, and it was only necessary to slightly alter it. In Instagram, a 3D model consists of a mesh and bones. In Snapchat, a 3D model consists of a mesh and shapekeys (or blendshapes).
What was the main challenge? Is this process similar in Spark AR and Lens Studio?
The main problem in Lens Studio is in blendshapes, because they are necessary to sculpt a mesh for each emotion so that they look adequate and beautiful. In Spark AR, it is necessary to connect bones to each point on the face, which takes some time.
The processes are very different for both platforms. In Spark AR, you need to load the mesh for the fur into the block, and what will be without fur must be loaded into the project separately. It turns out that you need to connect bones in the block and in the project itself. It took a lot of time. At the same time, in Lens Studio you just change material to fur material and that’s it. This makes it very easy to create a fur filters there.
by Helena Bahdzel
by Helena Bahdzel
Do you plan on creating any other furry Lenses?
Yes, husky, cat, and bear are planned. They are already on Instagram, so I want to transfer them to Snapchat. I’m also planning a fox head for both Snapchat and Instagram.
Do you have any favorite furry Lenses by other Creators?
I really like the Fur Glasses from Pavel Tkachenko.
Many thanks to Pavlo, Eddy and Helena for their contribution. Be sure to follow them and try out their filters!
More #FUR AR Filters
by Snapchat
by Maxim Kuzlin
by uzumaki.gallery
by susidko_
We can’t wait for new Instagram filters and Snapchat Lenses using fur shader, and we certainly can’t wait for what comes next for AR community! If you’re an AR Creator and want to share the developments that you came up with, feel free to contact us.